If you’re a developer or IT administrator exploring secure, self-hosted video conferencing platforms, there’s a good chance you’ve come across Jitsi Meet. In today’s privacy-conscious world, where every digital interaction matters, Jitsi stands out—not just because it’s open source, but because it puts complete control back in your hands.
Whether you’re deploying it for a small internal team or scaling to support thousands of users globally, knowing how Jitsi Meet works under the hood is key to a successful rollout. In this article, we’ll break down its core architecture, components, and how everything fits together—minus the jargon overload.
1. What is Jitsi Meet?
At its core, Jitsi Meet is a browser-based video conferencing tool built on WebRTC, which means there’s no need for downloads or plugins—just click and join. What sets it apart is that you can host it yourself. That gives you full control over your data, the experience, and even the branding.
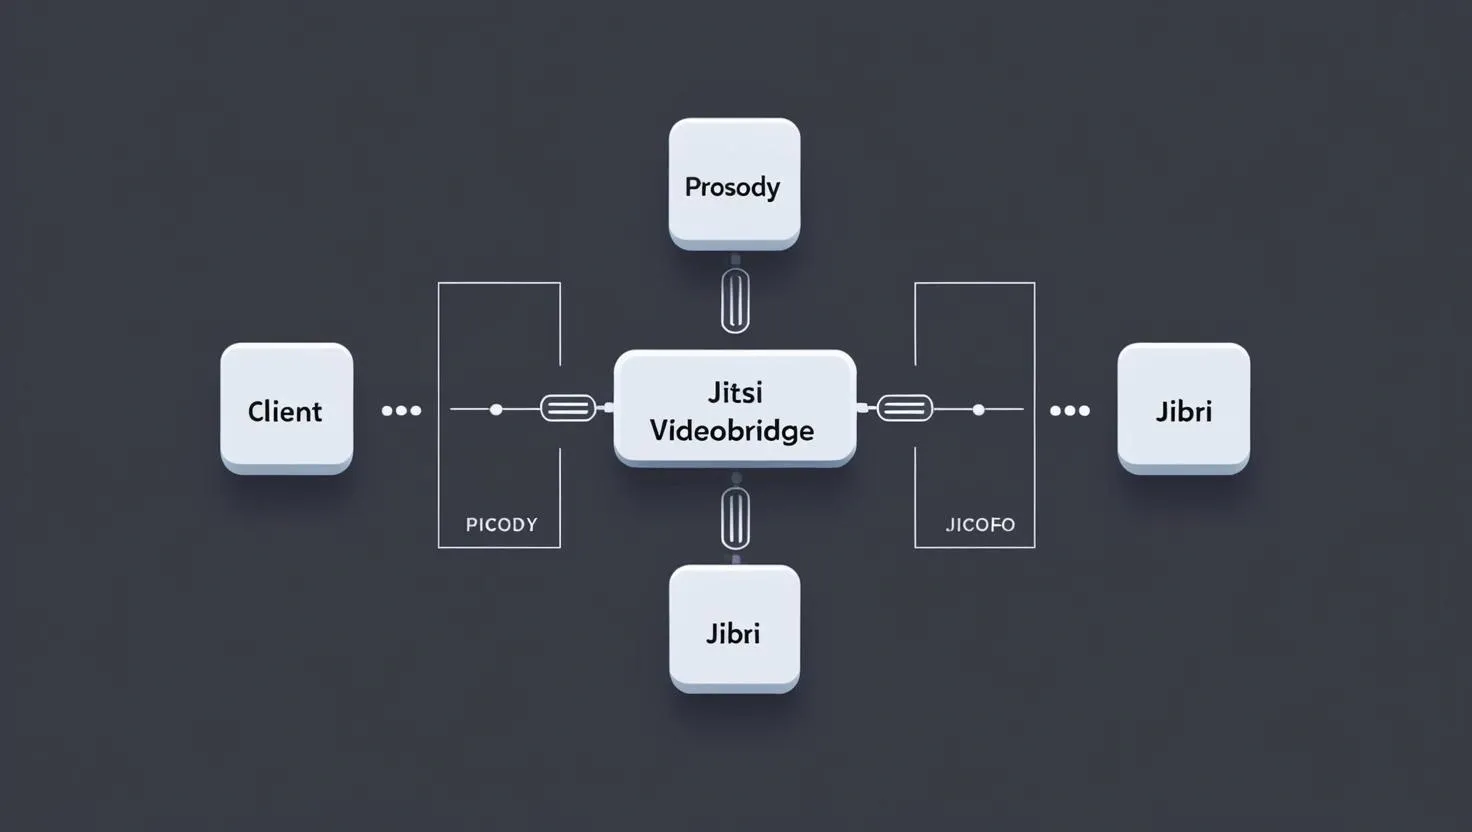
Here’s a simplified look at the key interactions:
Client (Browser)
Signaling Server (Prosody)
Control Server (Jicofo)
Media Server (Jitsi Videobridge - JVB)
Optional integrations:
Jibri for recording or live streaming
Jigasi for SIP/phone integration
JWT or LDAP for user authentication
2. The Core Components Explained
Let’s break down each part of the Jitsi Meet stack in plain English.
A. Prosody – The Signaling Hub
What it does: Prosody is the XMPP server that manages room signaling, user authentication, and message routing.
Tech used: It’s lightweight and written in Lua.
How it works: Think of Prosody as the traffic cop—directing user requests, creating rooms, and passing signals between users and the controller (Jicofo).
Popular Prosody Modules:
-- mod_auth_internal_hashed
-- mod_muc
-- mod_bosh
-- mod_websocket
-- mod_http_api
Prosody communicates in real time with browsers using BOSH and WebSockets.
B. Jicofo – The Conference Coordinator
What it does: Jicofo is like the meeting planner—it organizes the conference, negotiates media streams, and assigns video bridges.
Built with: Java
Responsibilities:
Creates and manages meeting rooms.
Assigns a JVB (Jitsi Videobridge) to handle media.
Works with authentication systems.
Sample Jicofo config:
org.jitsi.jicofo.BRIDGE_MUC=JvbBrewery@internal.auth.yourdomain.com
org.jitsi.jicofo.ALWAYS_TRUST_MODE_ENABLED=true
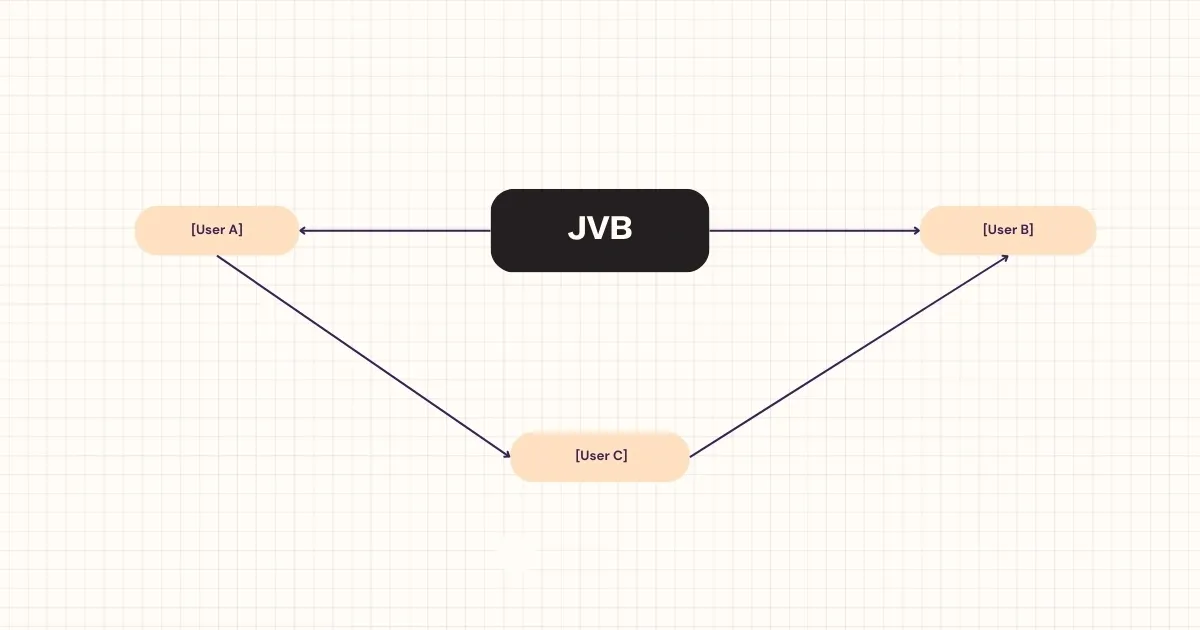
C. Jitsi Videobridge (JVB) – The Media Router
What it does: JVB handles all the heavy lifting of media—routing audio and video between participants.
How it works: It acts as an SFU (Selective Forwarding Unit). Each participant sends their stream to JVB, and JVB smartly forwards only the needed streams to others.
Why SFU is great:
It keeps client CPU usage low.
Reduces network load by forwarding only what’s necessary.
Diagram:

D. Jibri – For Recording and Streaming
What it does: Jibri allows you to record meetings or stream them live (e.g., to YouTube).
Tech stack: Uses Chrome, FFmpeg, and a virtual display environment.
Tip: Each Jibri instance should run on a dedicated VM or server, as it’s resource-intensive.
Jibri Config Sample:
{
  "recording_directory": "/srv/recordings",
  "finalize_recording_script_path": "/path/to/finalize.sh"
}
E. Jigasi – SIP Connector (Optional)
What it does: Bridges Jitsi with SIP-based phone systems.
Use case: Perfect for hybrid meetings where someone joins via a traditional phone call.
Bonus: Can also connect to VoIP platforms and PBX systems.
3. What Happens When Someone Joins a Meeting?
Let’s say a user clicks on a meeting link—here’s what goes on in the background:
The browser sends a join request to Prosody, which authenticates and starts signaling.
Jicofo receives the signal and sets up the meeting.
JVB starts handling audio/video streams.
If enabled, Jibri joins silently to record or stream.
The user sees and hears others, all in real-time.
4. A Typical Deployment Architecture
Here’s a simplified version of how the components connect:

5. Scaling Jitsi Meet for Larger Deployments
Need to support hundreds—or even thousands—of users? Jitsi’s architecture scales really well.
A. Add More JVBs
Deploy multiple JVB instances.
Jicofo load-balances users across available bridges.
B. Use Octo (JVB Mesh)
JVBs in different regions can route media between each other.
Great for minimizing latency for international participants.
Octo Config Example:
org.jitsi.videobridge.octo.BIND_ADDRESS=192.168.1.1
org.jitsi.videobridge.REGION=us-east
C. Multi-Shard Setup
Run separate shards (each with its own Prosody, Jicofo, and JVB).
Use HAProxy or a custom signaling layer to route users.
6. Authentication Options
Jitsi Meet gives you a few ways to control access:
JWT Tokens: Best for SaaS or custom apps. You generate tokens server-side.
Internal Auth: Manage users directly in Prosody.
LDAP/SSO: Connect to your organization’s identity provider.
JWT Token Example:
{
  "aud": "jitsi",
  "iss": "your_app",
  "sub": "meet.yourdomain.com",
  "room": "*"
}
7. Monitoring & Logging
Keeping tabs on your Jitsi deployment is essential.
Grafana + Prometheus: For performance dashboards.
Colibri Stats API: Provides real-time stats on JVBs.
Log files:
/var/log/jitsi/jicofo.log/var/log/jitsi/jvb.log/var/log/prosody/prosody.log
8. Locking It Down: Security Best Practices
You’re self-hosting, so you control your own security. Here’s what to do:
Enable secure domain setup (only authenticated users can start meetings).
Use HTTPS (Let’s Encrypt makes this easy).
Open only necessary ports: TCP 443 and UDP 10000.
Enable lobby mode or set room passwords.
Consider DDoS protection if you’re running a public instance.
Conclusion
Jitsi Meet might look complex at first, but once you understand the building blocks-Prosody, Jicofo, JVB, and Jibri—you’ll see just how modular and powerful it really is. Whether you’re building a private video tool for your team or a global conferencing app, Jitsi gives you full control over performance, privacy, and customization.
