
Introduction
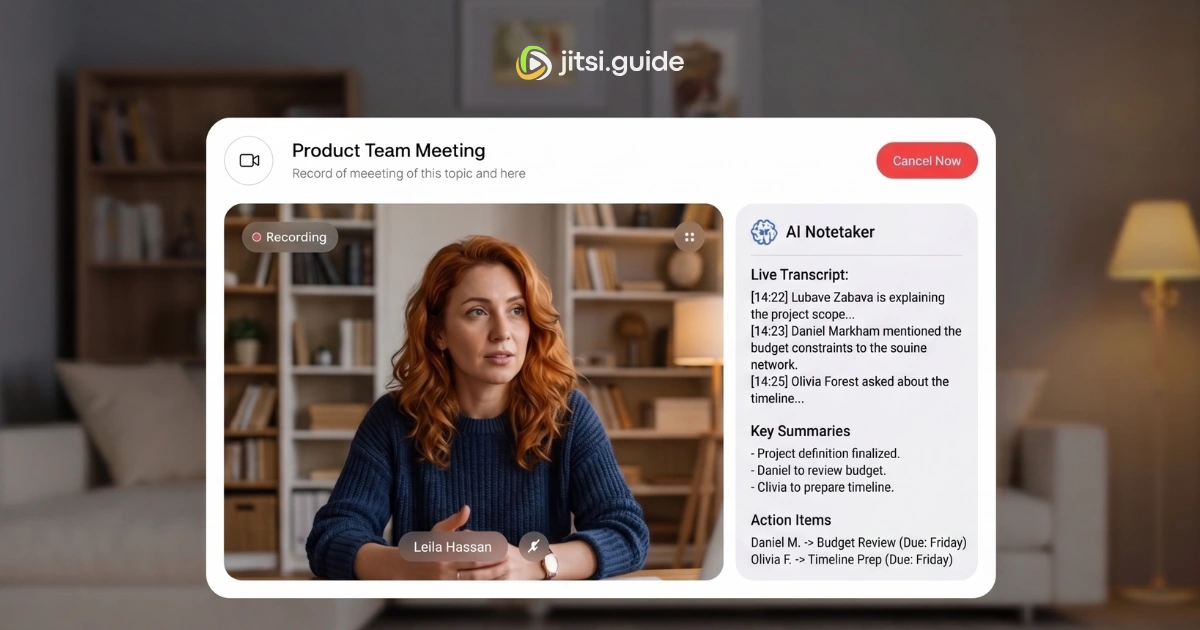
If you have ever left a video call and thought, “wait, what did we actually decide?” — you are not alone. Meetings move fast, and it is hard to talk, think, and take notes at the same time. This is exactly where an AI Meeting Assistant for Jitsi Meet comes in handy.
Jitsi Meet is one of the most popular open source video conferencing tools out there. Many teams like it because it is free, privacy-friendly, and does not force you into a paid plan just to host a call. But out of the box, Jitsi does not come with built-in AI note-taking or smart summaries. That is something you have to add yourself, or with the help of a few tools.
In this guide, I will walk you through how to build an AI Meeting Assistant for Jitsi Meet from scratch. We will cover the tools you need, the basic architecture, and a simple step-by-step process, without drowning you in confusing technical jargon. Whether you are a developer, a startup founder, or just someone curious about how these tools work, this article is written to be easy to follow.
Why Add an AI Meeting Assistant to Jitsi Meet?
Before jumping into the “how,” let’s quickly talk about the “why.” Adding an AI Meeting Assistant for Jitsi Meet gives you a few real benefits:
- You stop missing details. The assistant listens so your team can focus on the actual conversation.
- Automatic meeting summaries. No more spending 20 minutes after a call writing notes.
- Searchable meeting history. You can look back at what was said weeks ago.
- Action items get tracked. The assistant can pull out tasks and who is responsible for them.
- Better accessibility. Live captions help people who are hard of hearing or joining in a noisy environment. Since Jitsi Meet is open source and self-hostable, building your own assistant also means you keep more control over your meeting data, which matters a lot for teams that care about privacy.
What You Need Before You Start
You do not need to be a senior engineer to follow this guide, but a bit of comfort with basic coding and command-line tools will help. Here is what you should have ready:
- A working Jitsi Meet instance (self-hosted or using the public meet.jit.si for testing)
- A server or cloud environment to run your bot (a small VPS works fine to start)
- Access to a speech-to-text API (options are covered below)
- Access to a large language model API for summarization (like an LLM provider of your choice)
- Basic knowledge of Node.js or Python
- A bit of patience, since the first setup always takes a little trial and error
Understanding How an AI Meeting Assistant Works
At a high level, an AI Meeting Assistant for Jitsi Meet does four main jobs:
- Joins the meeting as a silent participant (often called a “bot” or “recording participant”)
- Captures audio from the meeting in real time
- Converts speech to text using a transcription engine
- Processes the text with AI to create summaries, action items, and highlights Let’s break each of these down.
1. Joining the Meeting as a Bot
Jitsi Meet supports something called Jitsi Meet Electron and also provides APIs like lib-jitsi-meet and jitsi-meet-sdk, which let you build a custom participant that can join a room programmatically. This “bot” participant behaves like a regular user but does not need a camera or a human controlling it.
There are a few ways to make this bot join calls:
- Using lib-jitsi-meet, Jitsi’s own JavaScript library, to create a headless participant
- Running a headless browser (like Puppeteer) that opens the Jitsi Meet URL and captures the audio and video streams
- Using Jitsi’s Jibri component, which is Jitsi’s own recording and streaming tool, and can be adapted to feed audio into your AI pipeline For most small to medium projects, the headless browser approach with Puppeteer tends to be the easiest starting point, since it does not require deep changes to Jitsi’s core code.
2. Capturing the Audio
Once your bot is inside the meeting, the next step is grabbing the audio stream. If you’re using Jibri, this is more straightforward since Jibri already records the full meeting session, including audio and video.
If you’re using a headless browser setup, you will need to route the audio output through a virtual audio device (tools like PulseAudio or ALSA loopback on Linux servers are common choices here) so your code can read the raw audio and pass it along for processing.
3. Converting Speech to Text
This is the heart of any AI Meeting Assistant for Jitsi Meet. You need a reliable speech-to-text (STT) engine. A few popular choices include:
- Whisper (open source, works well for many languages, can run locally)
- Google Speech-to-Text API
- Deepgram
- AssemblyAI
- Azure Speech Services If privacy and cost matter to you, running an open source model like Whisper on your own server is a solid choice. If you want something with less setup work, a cloud API might save you time, though it comes with an ongoing cost per minute of audio processed.
4. Turning Transcripts into Useful Notes
Raw transcripts are helpful, but they are often messy and long. This is where a large language model steps in to:
- Summarize the meeting in a few short paragraphs
- Pull out clear action items and who owns them
- Highlight key decisions
- Create a simple, readable meeting recap You can send the transcript text to an LLM with a well-written prompt asking it to summarize and organize the content. Keeping your prompt clear and specific (for example: “summarize this meeting transcript into three sections — key discussion points, decisions made, and action items”) gives you much cleaner results than a vague, open-ended prompt.
Step-by-Step: Building Your AI Meeting Assistant for Jitsi Meet
Now let’s put this together into an actual build plan.
Step 1: Set Up Your Jitsi Meet Environment
If you already run Jitsi Meet, you are ahead of the game. If not, you can either self-host using Jitsi’s official Docker setup, or test with the free public server first to get familiar with how meetings and room links work.
Step 2: Create the Bot Participant
Write a small script (Node.js works well here) using lib-jitsi-meet or Puppeteer that:
- Opens a Jitsi Meet room URL
- Joins with a display name like “Meeting Assistant”
- Disables its camera
- Stays connected until the meeting ends Keep the bot’s presence simple at first. You can always add more features later, like automatically joining based on a calendar invite.
Step 3: Connect Your Speech-to-Text Pipeline
Once the bot is capturing audio, stream that audio in short chunks (every few seconds works well) to your chosen STT engine. Save the returned text along with timestamps, so you know who said what and when, if speaker identification is available.
Step 4: Store the Transcript
Save each meeting’s transcript into a database. Even a simple setup works fine here, such as PostgreSQL or even a plain text file for a small pilot project. Just make sure to tag each transcript with the meeting date, room name, and participants if that data is available.
Step 5: Generate the Summary with AI
After the meeting ends, send the full transcript to your LLM of choice with a clear prompt. Ask it to return:
- A short overview of what was discussed
- A list of key decisions
- Action items with owners, if mentioned
- Any follow-up questions or open topics
Step 6: Deliver the Notes
Finally, decide how your team wants to receive the notes. Common options include:
- Sending a summary email automatically after each call
- Posting it to a Slack or Teams channel
- Saving it into a shared notes tool like Notion or Google Docs
- Building a simple dashboard where past meeting notes are searchable
Step 7: Test, Refine, and Improve
Run a few test meetings and check how accurate the transcription and summaries are. Adjust your prompts, check your audio quality settings, and fine-tune the bot’s join and leave behavior until it feels smooth and reliable.
Common Challenges When Building an AI Meeting Assistant for Jitsi Meet
It’s worth being upfront about the bumps you might hit along the way:
- Audio quality issues: Background noise or multiple people talking at once can reduce transcription accuracy.
- Speaker identification: Knowing exactly who said what is trickier than it sounds, especially with more than 3-4 participants.
- Bot stability: Headless browser bots can sometimes crash or disconnect, so build in automatic reconnect logic.
- Cost management: Cloud STT and LLM APIs charge based on usage, so keep an eye on your monthly costs as usage grows.
- Privacy and consent: Always let meeting participants know a bot is recording and processing audio, both for trust and for legal reasons in many regions.
Tips to Make Your AI Meeting Assistant Better Over Time
- Start small. Get transcription working well before adding summaries.
- Use short, clear prompts for your LLM instead of long complicated ones.
- Let users correct mistakes in transcripts, and use that feedback to improve your system.
- Add tags or categories to meetings (like “sales call” or “team standup”) so notes are easier to search later.
- Keep your bot’s presence clearly visible in the meeting so no one is confused about whether AI is listening.
Conclusion
Building an AI Meeting Assistant for Jitsi Meet is not as complicated as it might sound once you break it into smaller pieces: joining the call, capturing audio, transcribing speech, and summarizing with AI. Since Jitsi Meet is open and flexible, you have a lot of freedom to build something that fits exactly how your team works, instead of being stuck with a rigid, one-size-fits-all tool.
Start with a simple version, test it with your own team, and improve it step by step. Before long, you will have a tool that saves everyone time and makes sure nothing important slips through the cracks during a meeting.
Ready to get started? Set up a test Jitsi Meet room today, try a basic bot script, and see how it feels to have your first AI-generated meeting summary land in your inbox.